
If you don't want to read all of the post, at least scroll through to the end and look at all the pictures!
We have lived in our 1980's home for over three years, and this year we are starting to do some updates. One of the things we decided should happen is updating the fireplace in our front room. I didn't like the color of the brick when we bought the home, but when my husband painted our walls navy, I liked the brick color a lot more.
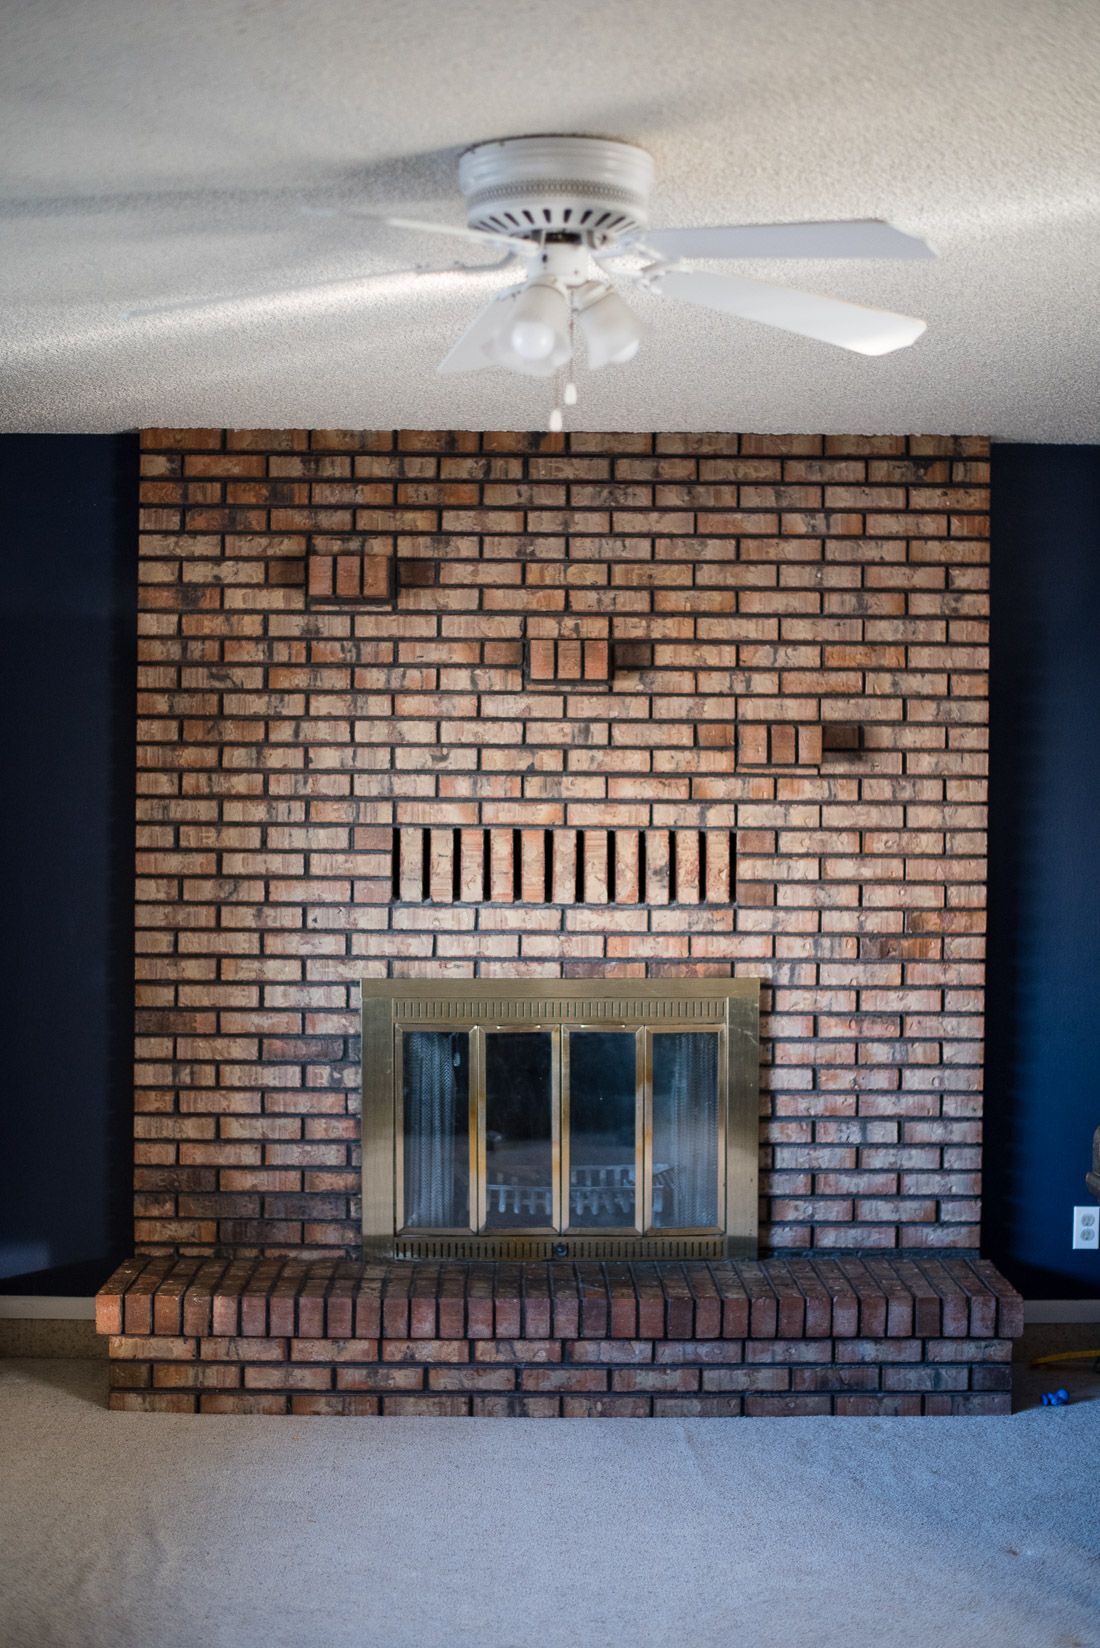
That 80's brass has always bothered me though, and the brick color still felt dated. Most importantly though, almost everything we like clashes with that brick. We want to paint our walls grey (along with everyone else, right?). Clash. All of our top floor picks. Clash. Any new furniture we talk about getting at some point. Clash. So we decided to paint the fireplace to make everything more cohesive.
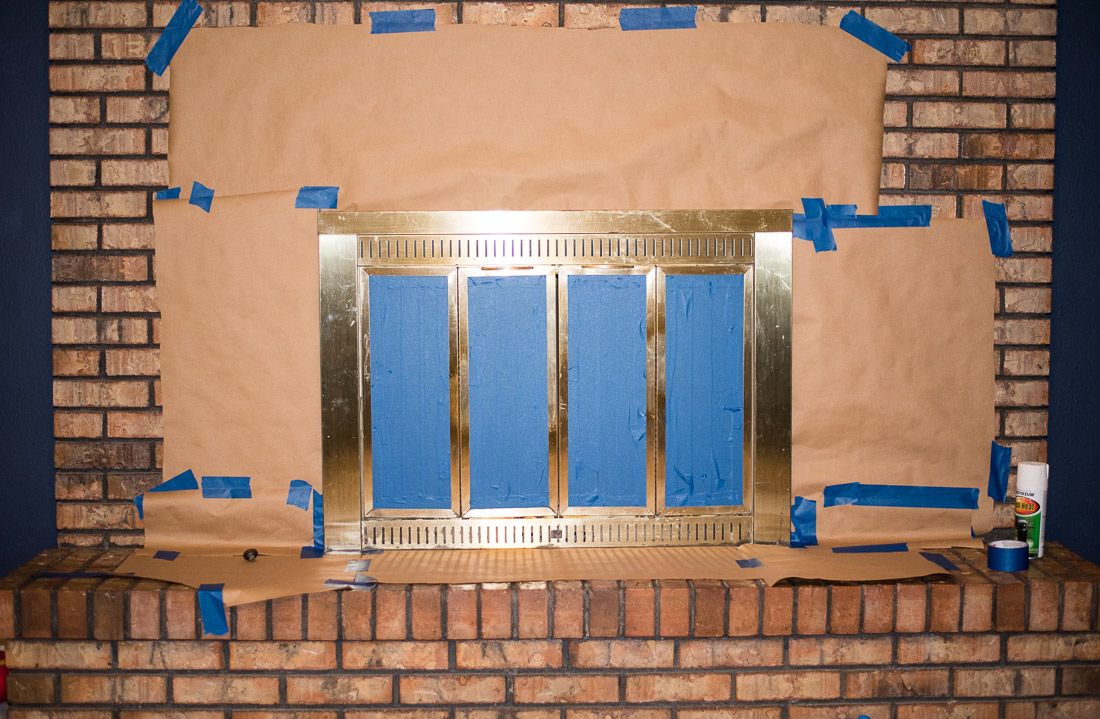
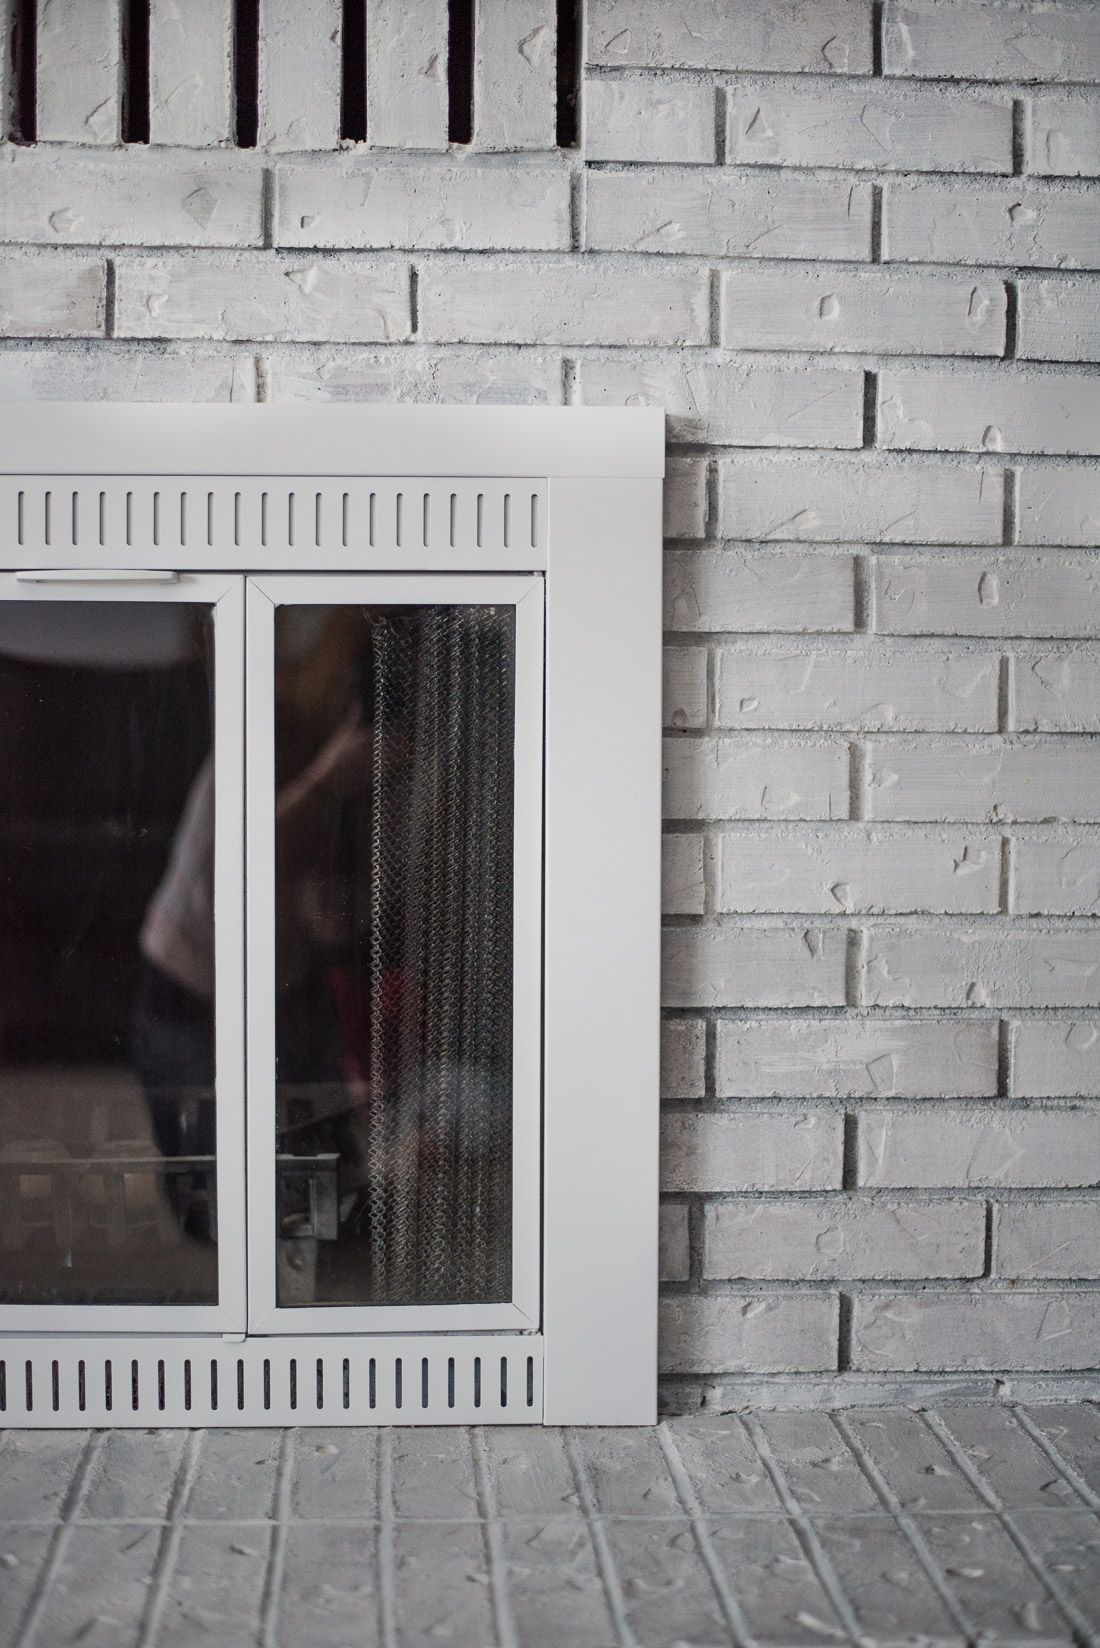
I started with the brass. I washed it all down, taped off the glass pieces, and covered all the surrounding brick with paper. Because it is a fireplace, I used paint made for high temperatures on the brass.

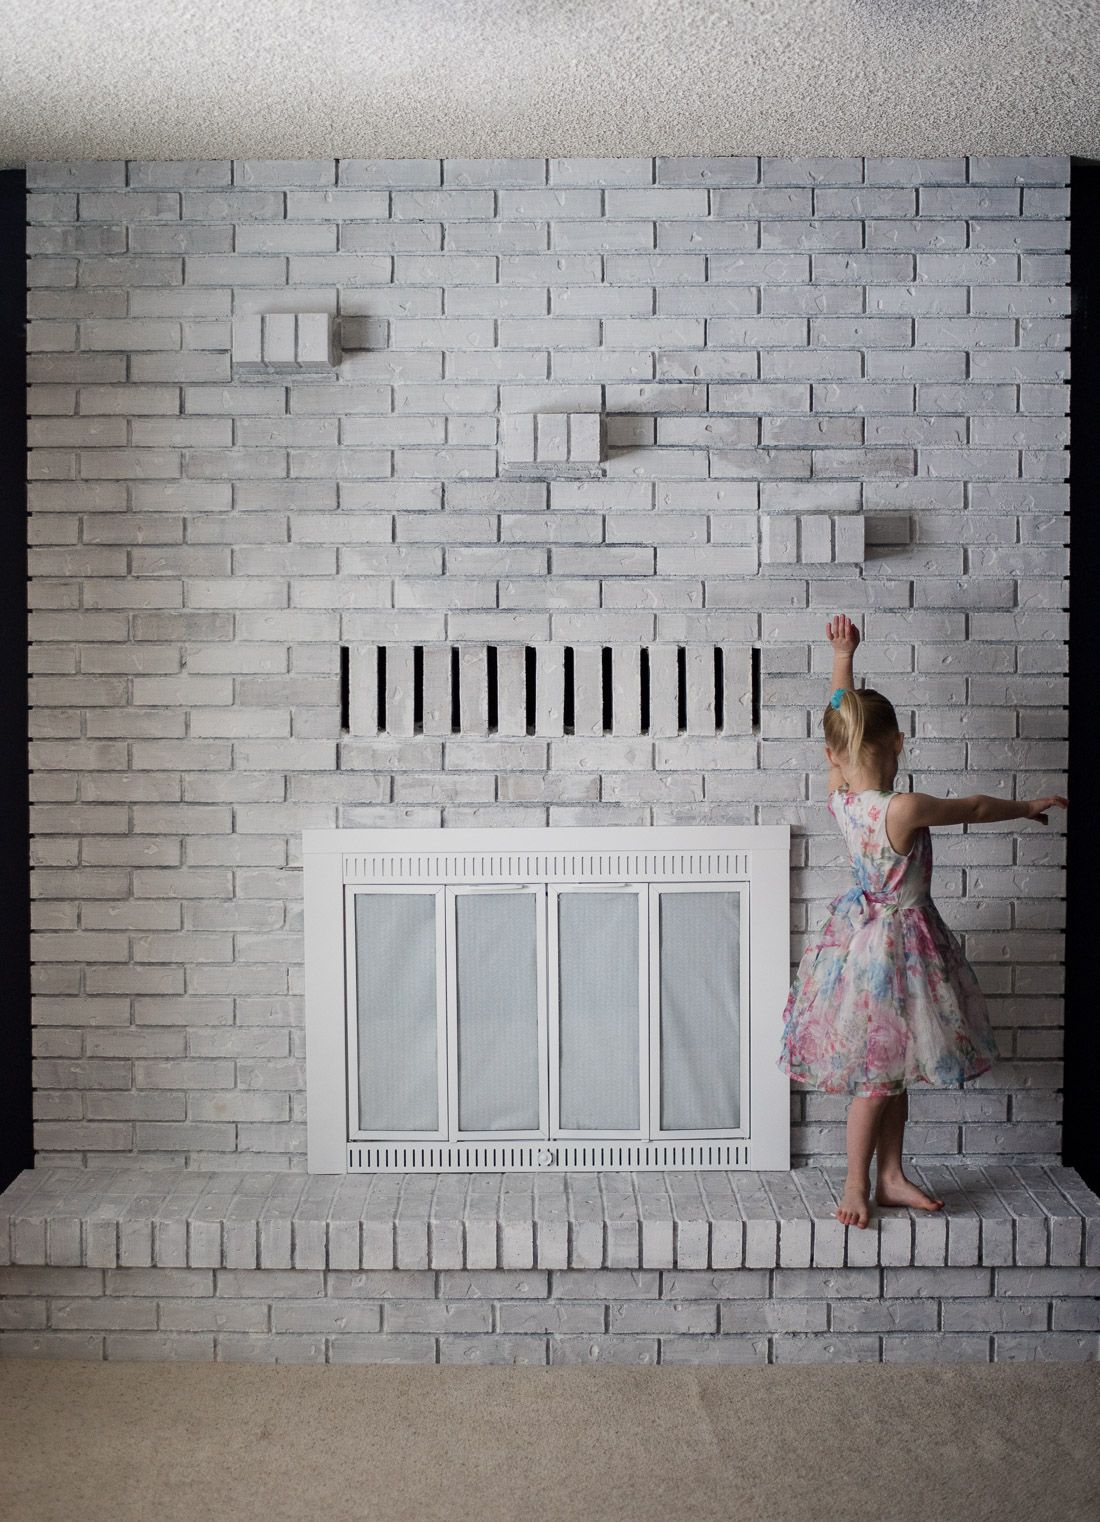
I went back and forth on the color for the brass. We knew we wanted to white wash the brick, and other people (my mom and my husband) both leaned towards doing a dark color for contrast. I wanted white although I was nervous, but I kept envisioning what a great backdrop this fireplace was going to make for pictures over the years. Black would stick out too much in pictures, and my gut kept telling me white on white was the way to go. Heat resistant white paint options are a little limited, so I went with a Rustoleum spray paint with a flat finish that I was able to get at Home Depot.
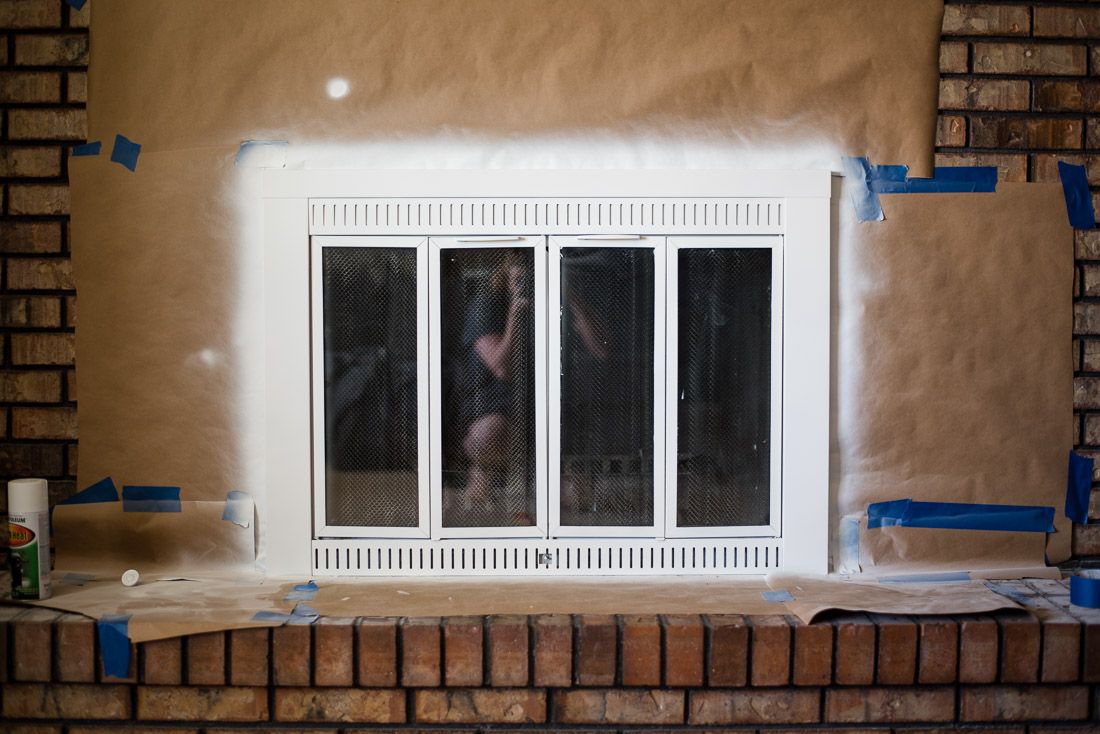
It took 6 coats. 6! My finger and hand hurt so bad after spray painting that much, but it was worth it. The finish is so smooth and perfect. It looks like it was made this way. If you look up brass updates online, some people use steel wool on the brass before they paint to help the paint stick. The paint I used was designed to be used on metal, so I decided last minute not to sand with steel wool because I was worried it would scuff things up. The paint adhered well and hasn't chipped or peeled. Some people also open the doors and make sure they got every bit of brass. That seemed like a lot of work, so I kept the doors closed while I sprayed. You can't see any brass with the doors closed, but there is brass on the inside if you open the doors. That extra work wasn't worth it to me because I never open the doors.
The next step was white washing the brick. One of my friends suggested Annie Sloan Chalk Paint. It was expensive compared to other paints, $40 for a small can. I really liked working with it though, and it goes a long way, especially since I watered it down. I didn't even use the whole can. It also didn't have any paint smell to it which was nice.
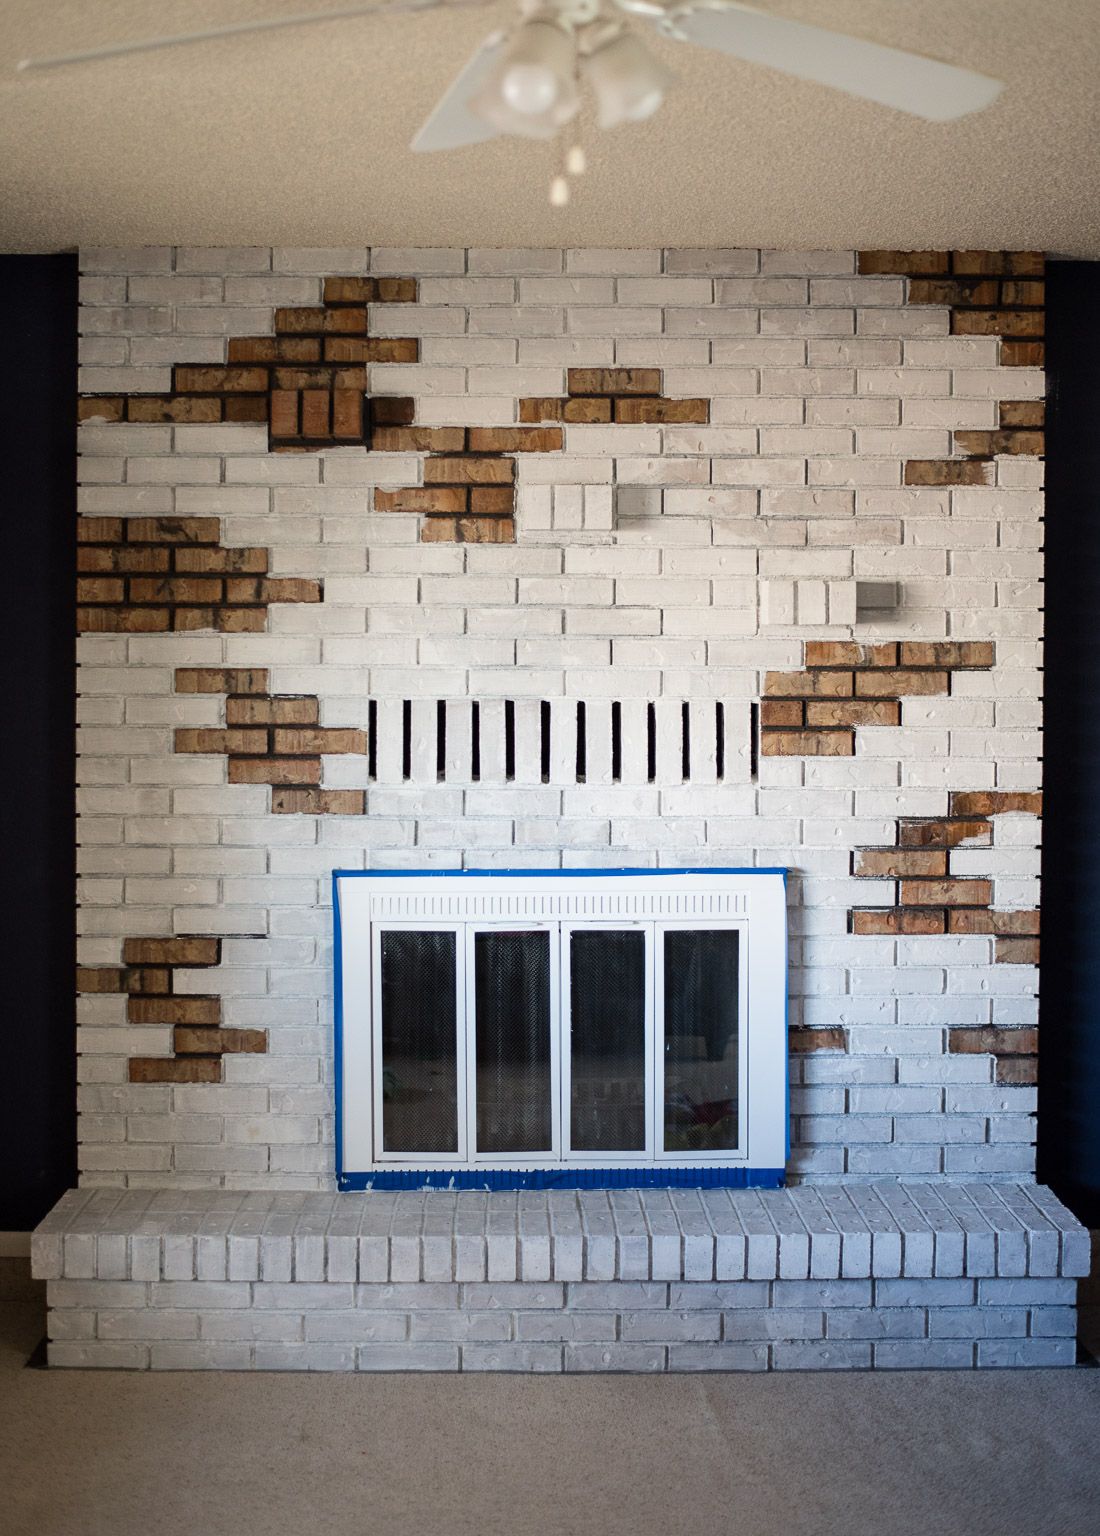
I quickly learned after I started painting that each time I mixed another batch of paint and water that the consistency was always slightly different, and even as I painted, the mixture would get thicker. I wanted to avoid one side of the fireplace looking drastically different from the other, so instead of going from one side to the other, I painted in patches. It was kind of fun picking out which chunks and designs I would paint next, and I'm glad I did it that way because parts of my fireplace are whiter than others, but the finished fireplace looks great with those variations.
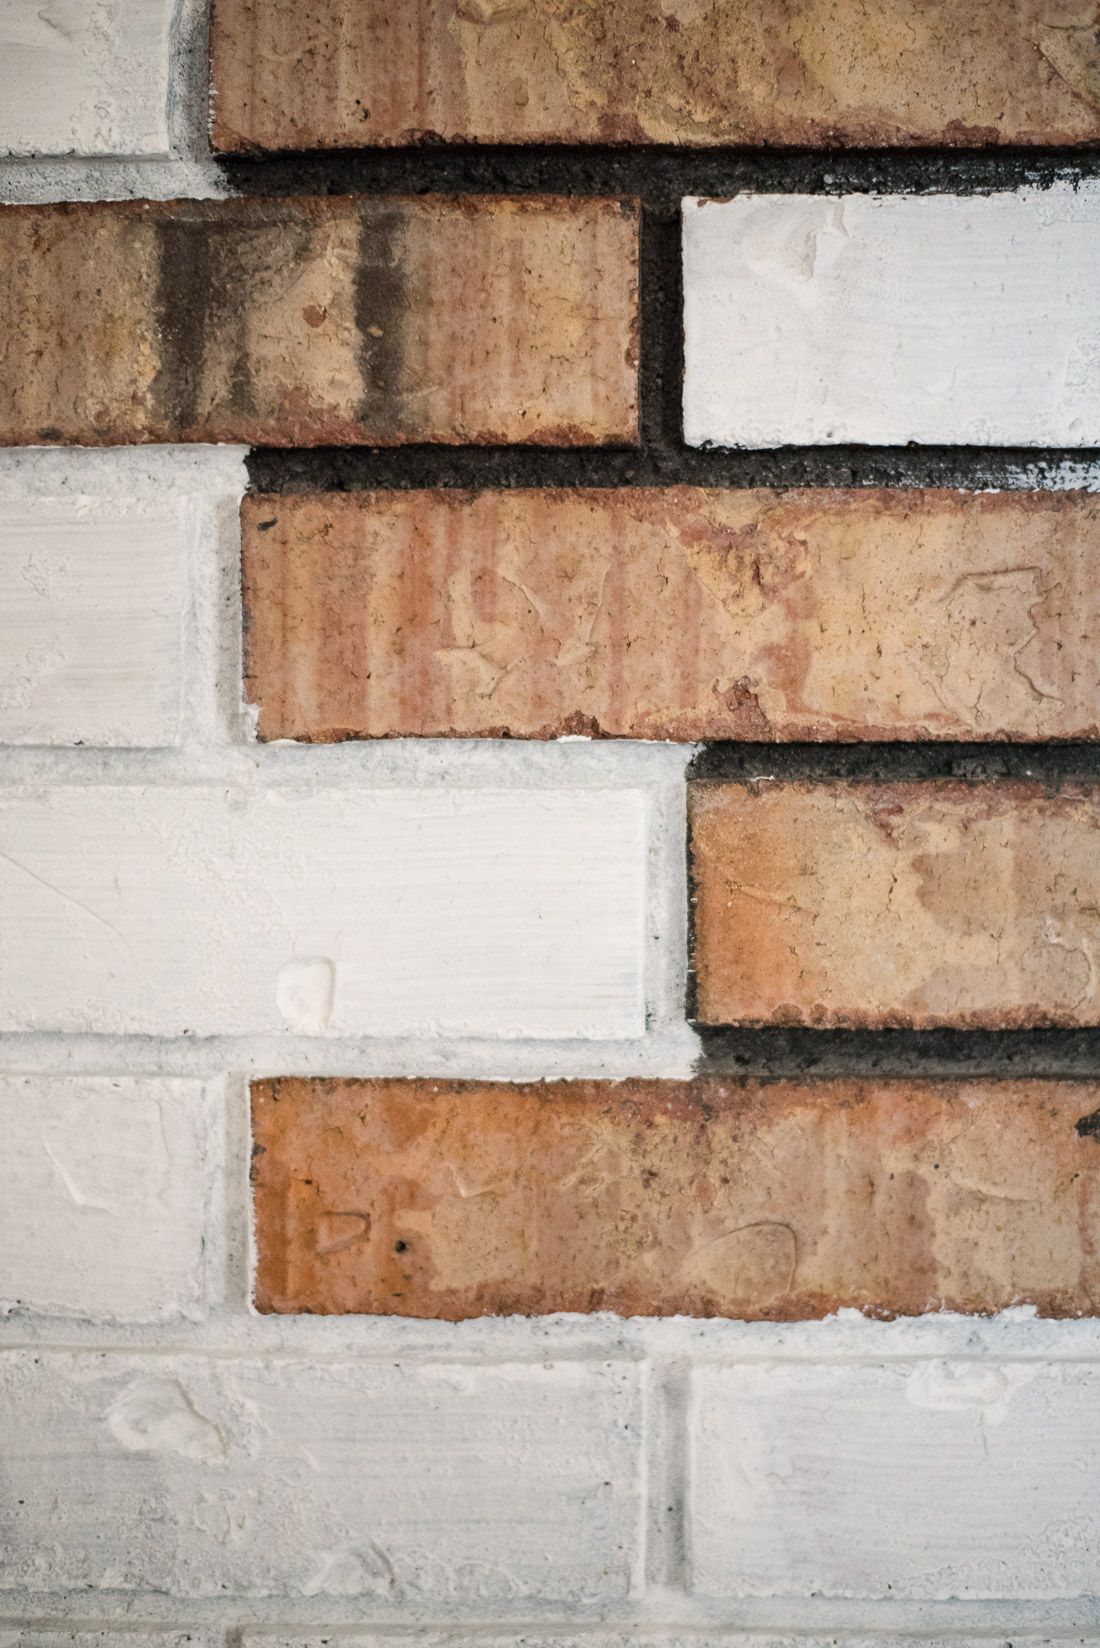
Painting the brick took way longer than I expected! The mortar joints in between the bricks is deep and has a rough texture. I had to get a little paint brush and go back and forth and really dig in. The surface of the bricks was pretty easy. One thing that is often suggested for this DIY project that I saw over and over again when researching is to spray the brick with water before painting. This helps the brick from soaking up all the paint. My brick had a glazed smooth surface though, so I found spraying it just made everything run off, so I didn't spray it after the first section. Another thing people often do is dab at the painted brick while the paint is still wet with a rag to lighten up the color in spots. Because of the glaze on my brick, this just wiped all the paint off, so I also skipped this step as well.
Remember how I said I wanted this to be an ideal backdrop for pictures? Once I had painted everything else I realized that the glass now looked really dark. The firebox inside is all black and ashy, so the glass ended up being gaping black holes which didn't seem ideal for pictures.
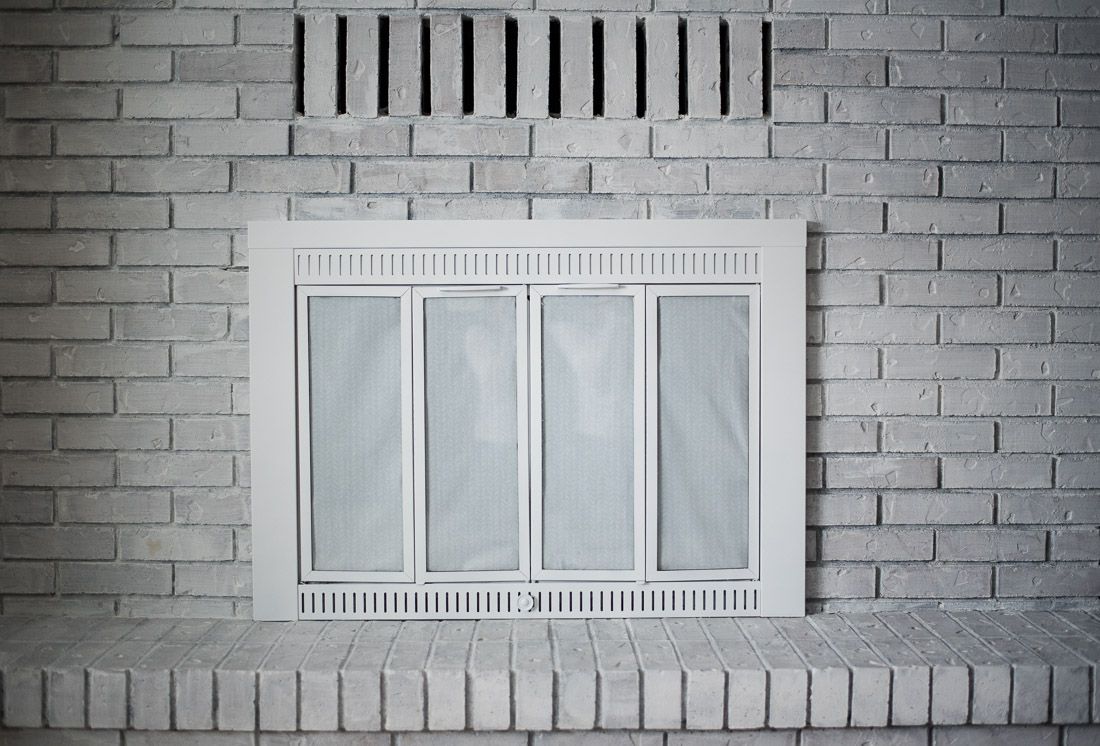
I wanted a cheap and easy solution to fix this, so I bought some patterned white fabric and taped it to the inside of the glass. Obviously I can't start a fire with the fabric where it is, but I don't want to use the fireplace until I've had it cleaned and inspected, and I don't want to worry about my kids getting burned, so I don't see this being a problem anytime in the near or somewhat near future.
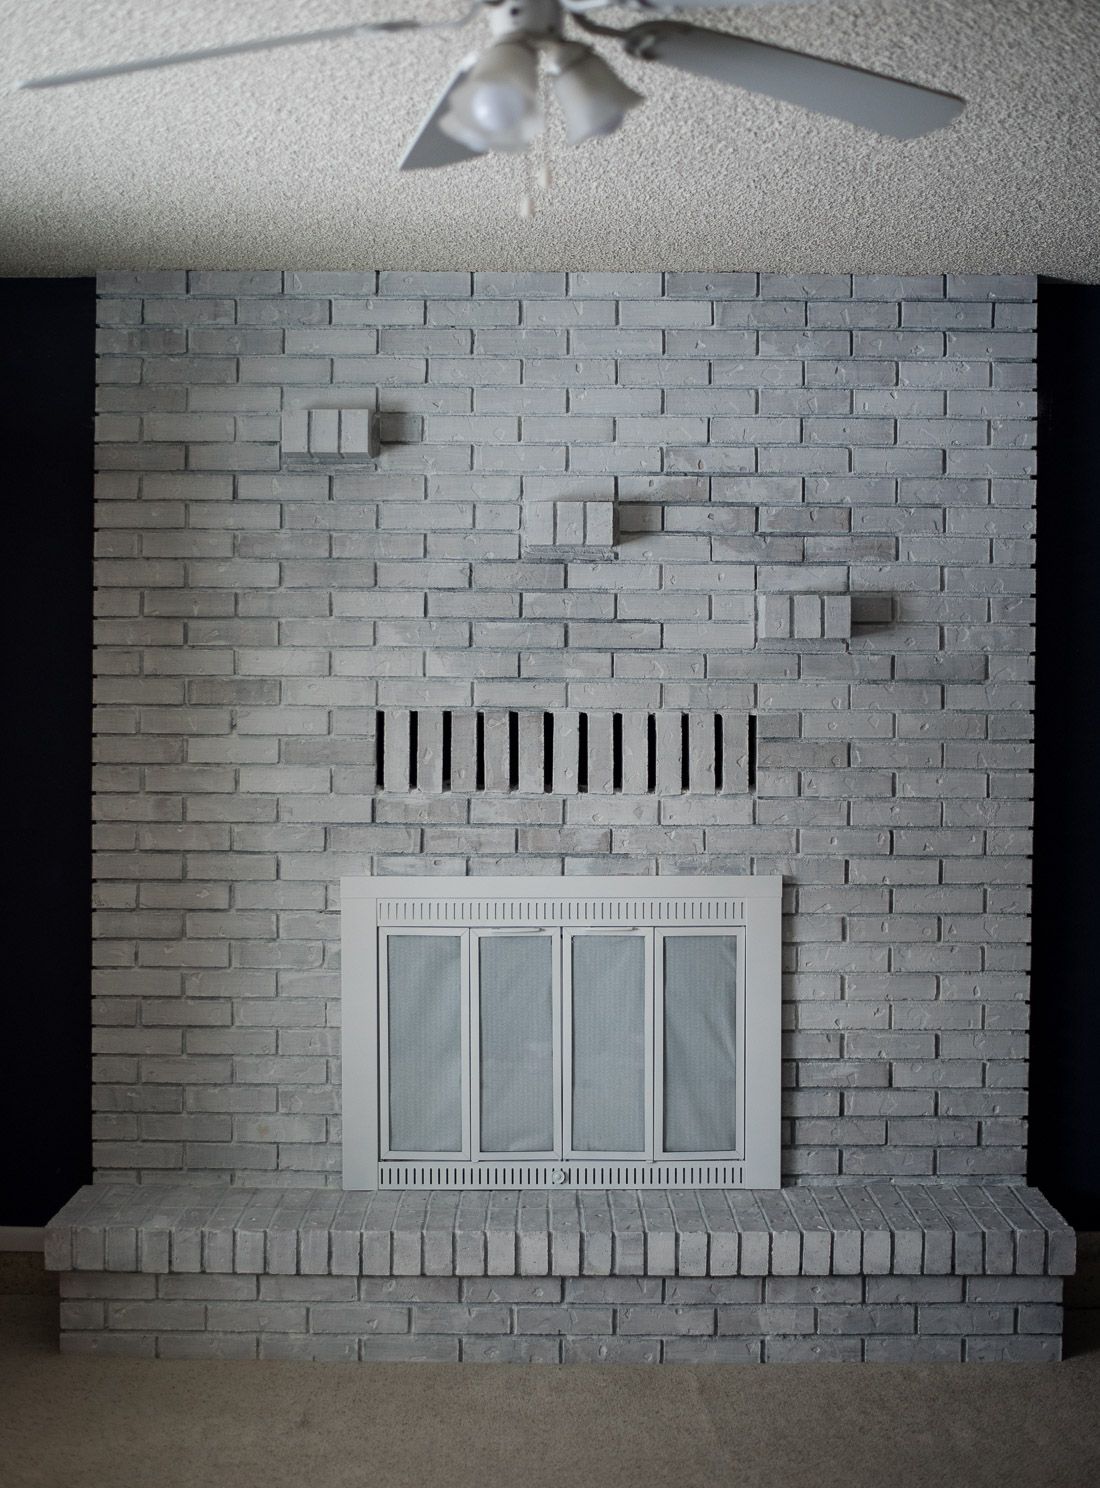
And there you have it! My finished fireplace! I was so happy with how it turned out. Then came a couple of impromptu mini sessions with my kids because they were being cute by the fireplace and I couldn't resist . . .
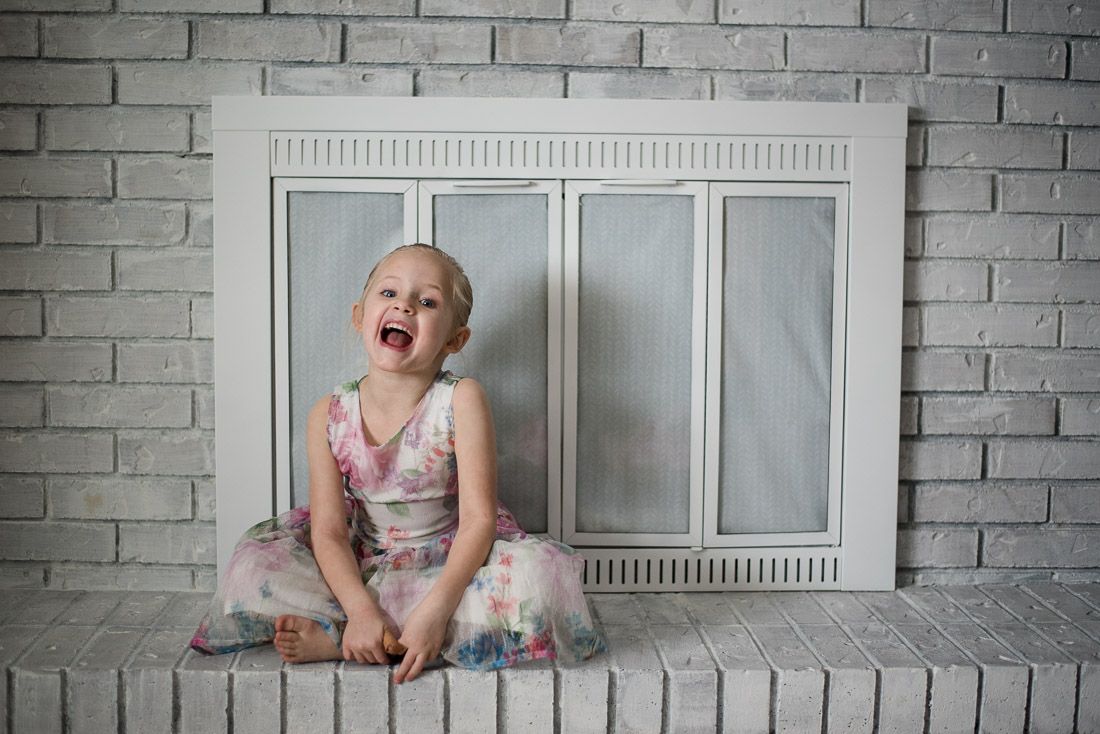

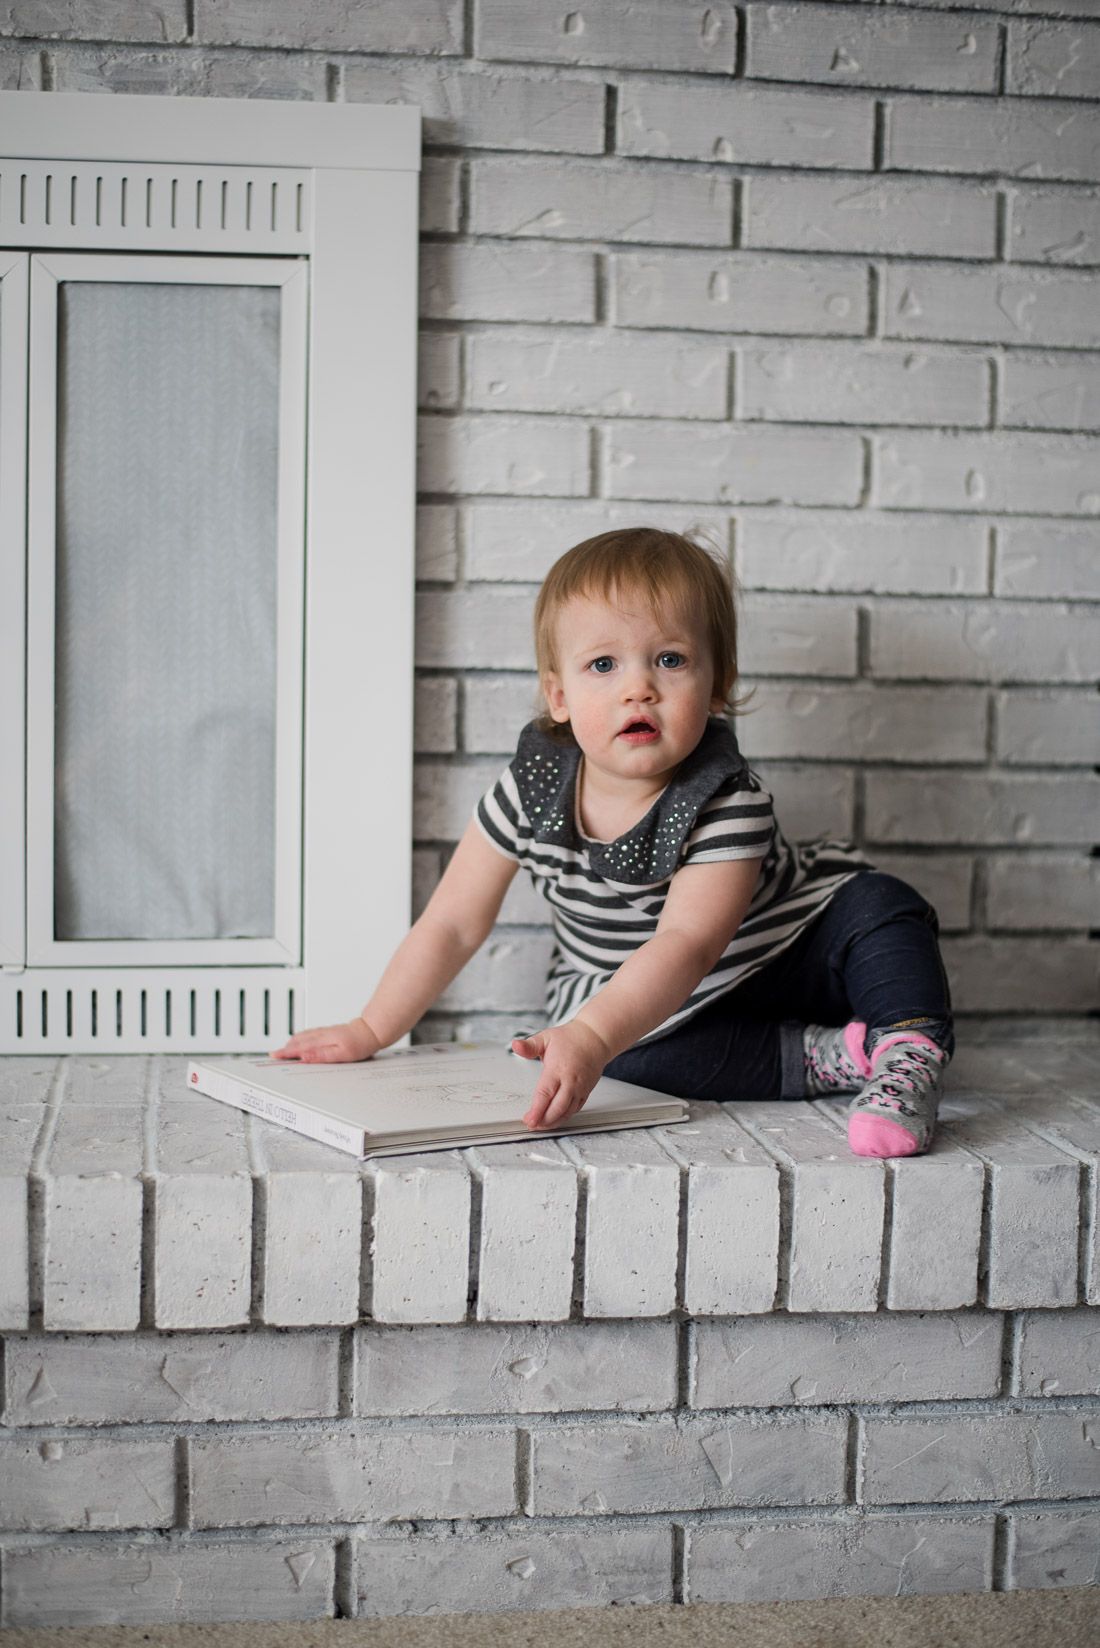
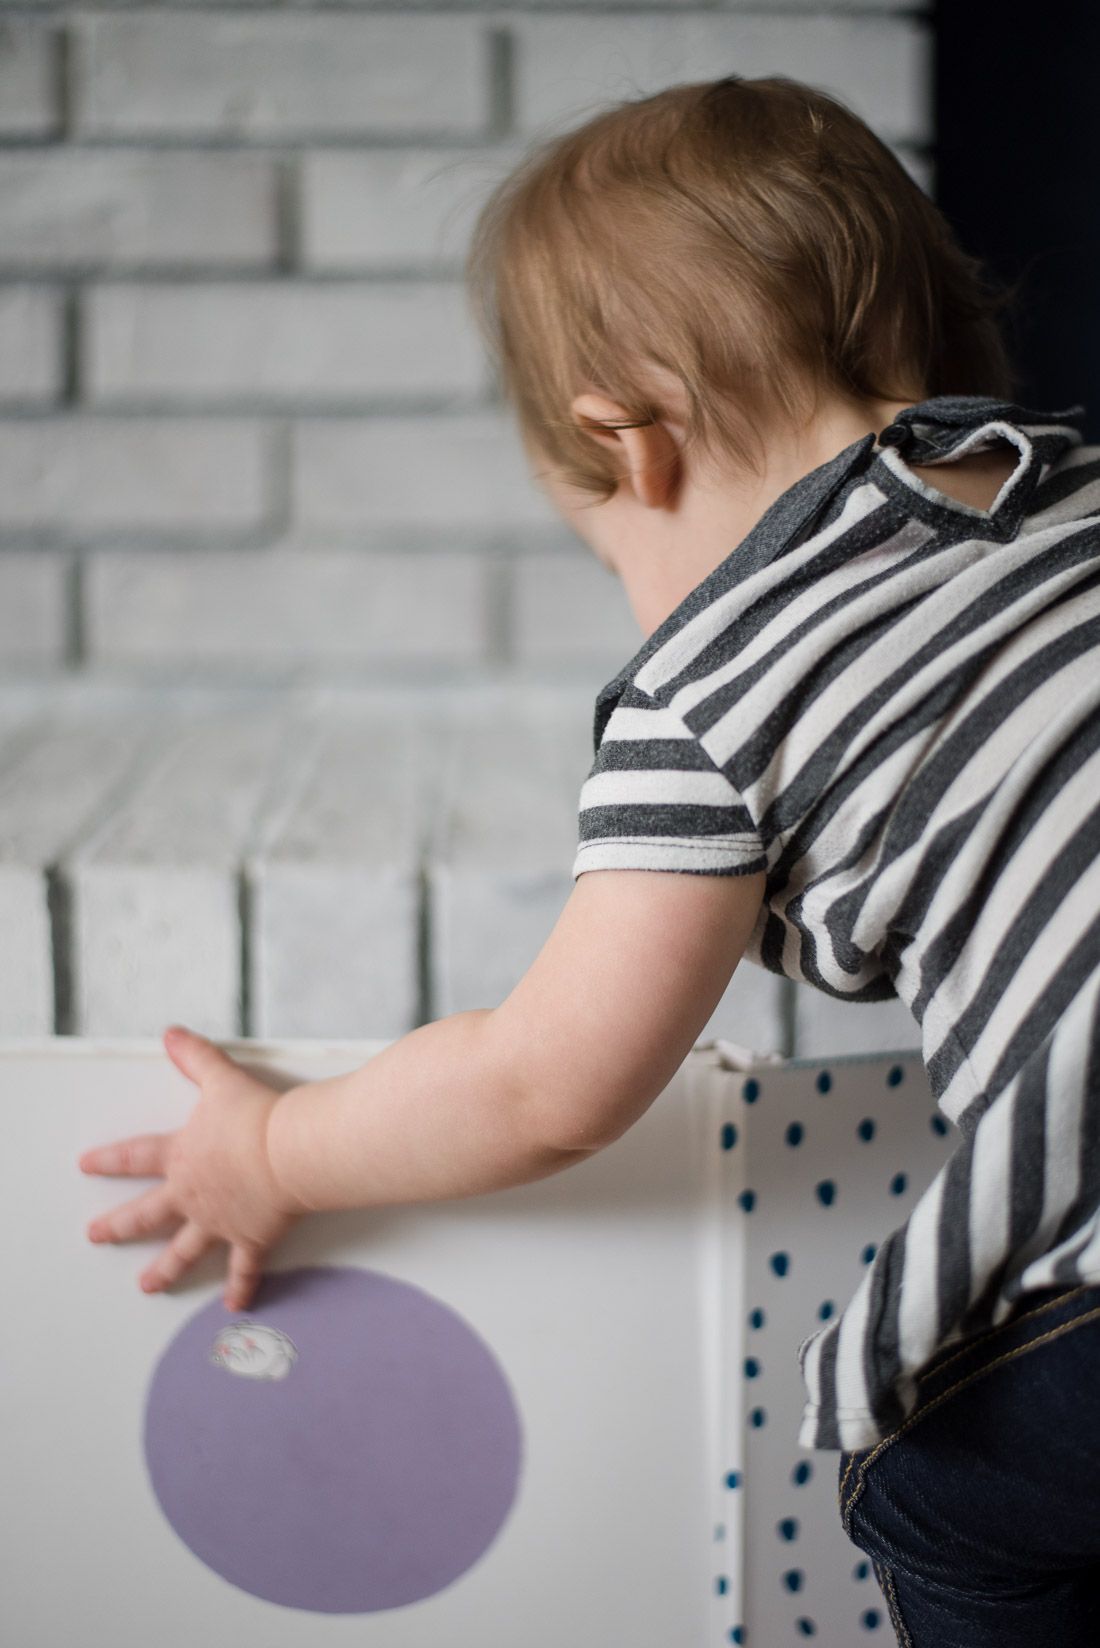
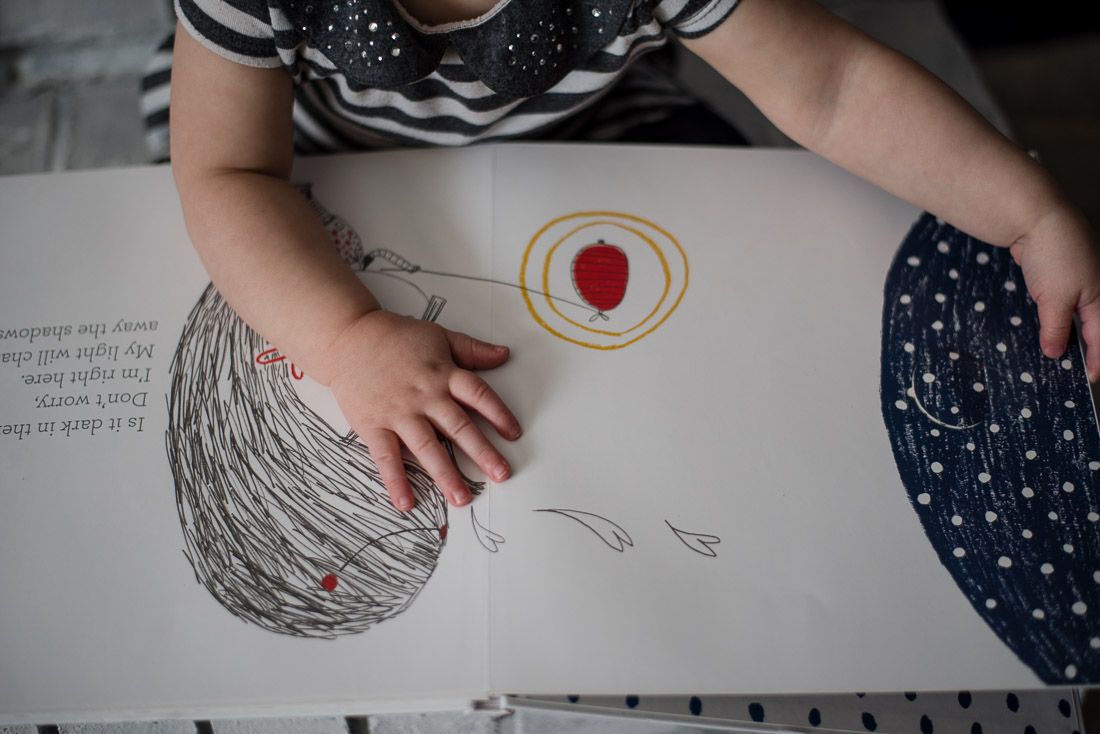
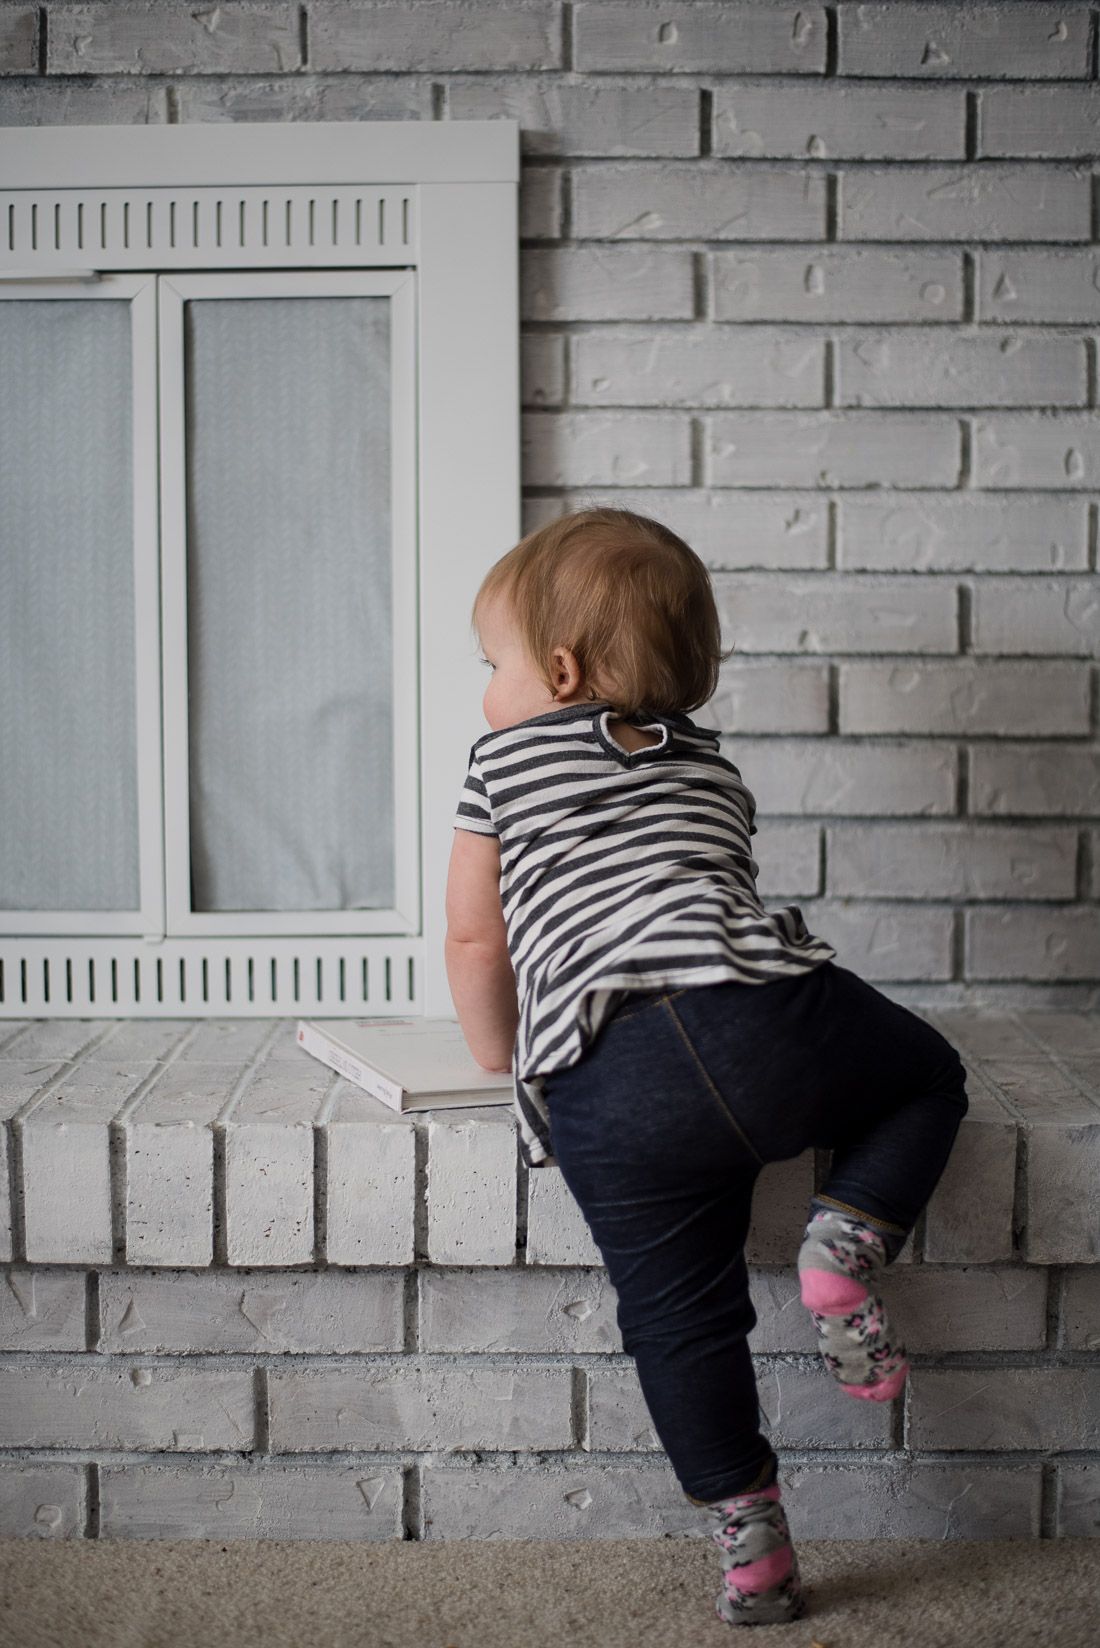
It was everything I hoped for!
A family photographer in Southern Utah, Bethany Allen loves photographing real moments in an artistic way. She brings this same approach to her wedding photography as well.


